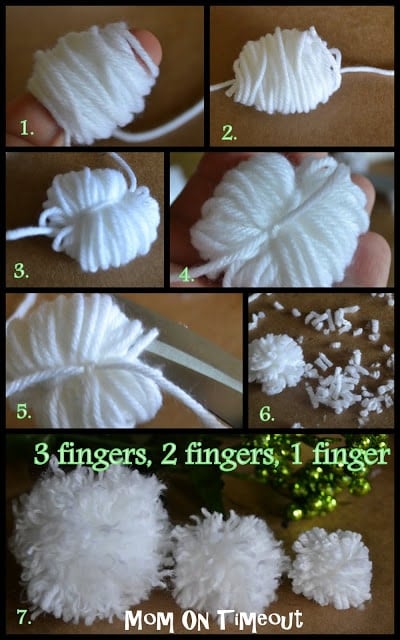
1. Cut a length of yarn (about 12 inches) and lay it on a flat surface. Now start wrapping yarn around your finger(s). Make sure you wrap loosely enough that you can slide the yarn off your fingers when you are done and are NOT cutting off your circulation. If you are using one finger, wrap 75-100 times. If you are using two fingers, wrap 100-125 times. If you are using three fingers, wrap 125-150 times. Now this is all approximate because every finger is a different size and yarn can have varying thicknesses. If you make your first one and it’s not full enough (make sure you count!) add another 10-20 wraps next time.
2. Pull the yarn off your finger(s) and lay the bundle carefully on top of the cut piece of yarn – making sure to center it both horizontally and vertically.
3. Tie the piece of yarn around your bundle TIGHTLY. THIS IS THE MOST IMPORTANT STEP. If you do not make this knot tight – your pom pom WILL fall apart. Hence step 4.
4. Turn your bundle over. Pull up the pieces of yarn on either side and tie again TIGHTLY. (Repeat this step again if you feel it’s necessary.
5. Cut the loops of yarn on your bundle make sure it cut each and every one. Just slide the scissors up and under the loops and cut making your way around.
6. Make your pom pom into a ball by rotating it around and cutting off any pieces of yarn that are outside your perfect sphere.
7. Go crazy with your pom poms! Can’t think of anything to do? Stay tuned – I’ve got three pom pom crafts coming up that are tons of fun.
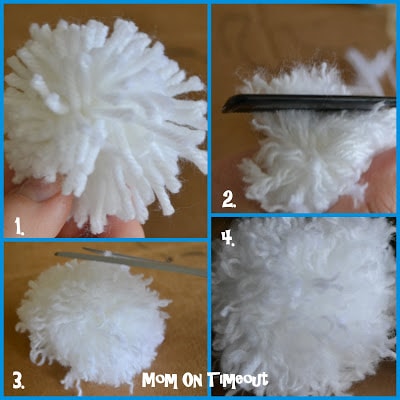
1. Complete steps 1-5. Don’t bother trimming your pom pom at this point because you’re just going to mess it up.
2. Take a comb or any other tool with teeth or bristles and comb through the yarn. IMPORTANT: Hold the pom pom super tightly so that the pieces of yarn don’t pull out. Now that being said, I usually still lose 2 or more piece of yarn while combing. No biggie!
3. Keep on combing until you achieve your desired look. The more you comb and separate the fibers of the yarn, the fluffier and poofier (apparently not a word) your pom pom will get.
4. Now it’s time to trim. Just work your way around until it looks nice and spherical.
1. You can always make your pom pom smaller by trimming it down. You can never make it bigger.
2. Try using multiple colors. Wrap half with one color and half with another. Or go crazy and try three colors.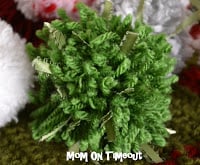
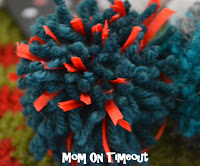
3. Add in texture and shine by using some ribbon. Halfway through wrapping, wrap the ribbon around your fingers as many times as you want and then continue with the yarn. When you cut the loops you can see how cool it will look.
4. I think this would make a fun cat toy 🙂
5. When combing the yarn, hold the yarn at the base of the strand so it doesn’t pull out. Kind of like when you are combing tangled hair.
6. Pom poms can be used on hats & scarves and are a wonderful addition to lots of craft projects.
7. Once you’ve mastered the basic technique you will be able to see how you can change it up to make more unique pom poms.
Linking up here and Home Stories A2ZTutorials and Tips


josie allman says
Is there a step by step instrustion list on the bunnies.
My 9 yr.old grandaughter would love making these for her friends
That can print out. Thanks to to cute…Thanks
P.S. love all your recipes…